Best Lightroom Presets for City Photos: Sharp Streets, Neon Nights & Clean Urban Tones
Quick answer: The best Lightroom presets for city photos keep buildings sharp, streets clean and neon glowing without turning the frame garish. A good city preset balances crisp detail with restrained colour, so glass towers, busy crossings and quiet lanes all feel part of the same place. Choose one clean urban style, protect the highlights on signs and windows, and let the city’s own geometry do the talking.
Why City Light Demands a Clean Grade
City light is a mixture of everything at once. Daylight bounces off glass towers, shop signs glow in colours the sky never produces, and street lamps warm one side of a lane while the other stays in cool shade. A camera captures all of that honestly, which means the edit has to decide what the city should feel like. Push the colour too hard and the streets look like a theme park; hold it back too much and the photograph loses the energy that makes a city worth shooting.
The second challenge is clutter. A city frame is full of competing details: wires, signs, people, vehicles, reflections and textures, all fighting for attention. A heavy-handed edit sharpens everything equally, turning the picture into visual noise. The presets that work best in the city are selective in their effect: they keep the main lines crisp, quieten the background, and let one subject — a tower, a crossing, a neon sign — lead the eye.
What Makes a City Preset Work
Start with the sharpness of the lines. Buildings, bridges and crossings depend on straight edges and clean geometry, and a good preset keeps those edges crisp without making them harsh. Look for a look that holds the detail in brick, steel and glass, so the photograph still feels like a real street rather than a sketch. If the edges start shimmering or doubling, the preset is sharpening too aggressively.
Next, watch how the preset treats mixed light. A city frame may hold warm lamps, cool daylight and coloured neon all at once, and the preset should keep those sources distinct instead of blending them into one muddy tone. The best city presets steady the white balance so the pavement looks neutral, while letting the neon keep its own vivid colour. That contrast between a calm street and a glowing sign is what gives urban photographs their spark.
Contrast is the third test. A street scene gets its depth from sunlit facades set against shaded lanes, so a grade that flattens either side kills the sense of space. Aim for separation without harshness: each facade should read as distinct, yet the darker lanes must still reveal the people and shopfronts within them. Judge it by peering into the deepest doorway — detail visible there means the grade is working.
- Crisp geometry: straight edges and clean lines kept sharp without harsh shimmer.
- Steady mixed light: warm lamps, cool daylight and neon kept distinct, not muddied.
- Neutral pavement: streets and sidewalks that stay true instead of picking up a colour cast.
- Open shadows: shaded lanes and doorways that still show people and shopfronts.
- Glowing neon: signs that keep their vivid colour without bleeding into the night.
Preset Styles That Suit Urban Scenes
Clean modern presets are the most natural fit for city photography. They keep the colours true, the contrast gentle and the lines sharp, giving the frame a fresh, editorial feeling that suits glass towers, new districts and quiet residential streets. This style shines in daylight, when the city is already bright and the preset only needs to tidy it up. Used gently, it makes a city series feel polished and professional.
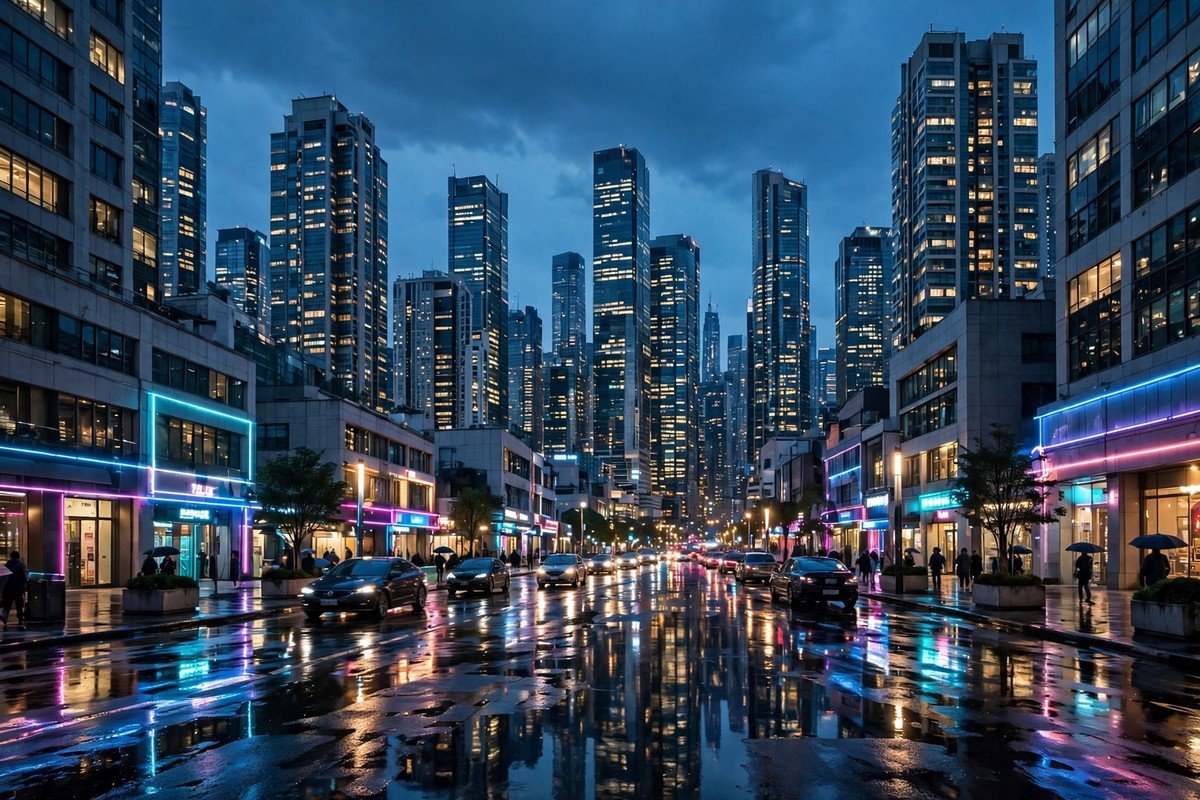
Moody urban presets offer a darker path for photographers who love atmosphere. They darken the edges slightly, enrich the blues of dusk, and let neon signs and lit windows blaze against the gloom. Rainy evenings, underground crossings and old industrial quarters all suit this treatment, because it brings a film-like richness no pale grade can equal — provided the darker corners keep visible detail, so the mood remains deep instead of turning muddy.
Warm street presets suit photographers who want the human side of the city. They deepen the amber of lamps and shop windows, soften the contrast, and give the frame a welcoming, lived-in feeling that suits markets, cafes and busy pavements. A crowded crossing at dusk suits this style beautifully, though the warmth must stay restrained: lay it on thick and the glass towers turn yellow while the sky takes on a smoky cast.
Bold colour presets are for photographers who want the city at its loudest. They lift the saturation of signs, murals and painted walls, sharpen the geometry, and make the frame feel electric. This style suits neon districts, street art and festival nights, where the city itself is already vivid. It needs careful handling in daylight, when strong colour can overwhelm the buildings, but at night it can turn an ordinary street into a striking composition.
Editing Neon Nights
Neon night is the city photographer’s favourite hour, and it is also the easiest to overdo. Signs glow in pink, cyan and amber, wet streets mirror every colour, and the sky turns a deep, velvety blue. Begin by setting the overall brightness so the brightest sign still shows its letters and the darkest lane still shows its pavement. Then choose a style that supports the glow you actually saw, rather than inventing colours that were never there.
Work on the colour in small steps. A gentle lift in the vivid tones will make the neon sing; a large one will make it bleed into the surrounding darkness. Check the pavement as you go: if the reflections start turning into solid blocks of colour, you have gone too far. The same care applies to skin tones, which can pick up a pink or green cast from nearby signs, so steady the faces before you finish.
Composition deserves the same attention as colour. A single sign, framed by dark buildings, can anchor the whole picture, while a long reflection leading down a wet street gives the viewer a path to follow. Keep the verticals straight, since leaning towers can make a calm night scene feel restless, and give the sky room to breathe. For more ideas on glowing light after dark, the sunset photography presets guide covers warm evening light in open landscapes.
Keeping a City Series Consistent
What makes a city set feel unified is a shared colour family running through every frame, even as the light transforms from pale morning to fierce noon to neon night. Choose one clean treatment before you start shooting, use it on all of them, and let only exposure and tint wander slightly as the hours pass.
When the shoot ends, place your best frames beside each other on screen — a quiet lane at dawn, a tower at noon, a market in the afternoon, a neon street after dark. Spot any frame that burns hotter, sits darker or pushes colour harder than its neighbours, then rein it in gradually until it sits comfortably with the rest. A coherent collection stays with viewers far longer than a single standout stranded among pictures that clash with it.
City Editing Mistakes to Avoid
The most common error is oversaturating the neon until the night looks artificial. A heavy pink or cyan wash can feel thrilling as you edit, yet anyone looking twice will spot the exaggeration straight away. Instead, keep saturation at the level the street itself actually showed — a vividness that still rings true when you come back to the image years later.
A second trap is letting the shadows go completely black. Push the dark tones down too far and the lanes, doorways and people melt into one blank shape. Ease the shadows up until the street regains its layers, even if the frame ends up a touch less dramatic. Last, mind the verticals: leaning towers or a tilted horizon can drain the calm from a quiet city frame, so keep the buildings straight and the pavement level.
- Garish neon: vivid signs pushed so far that a real street looks like a theme park.
- Black lanes: shaded streets melted into one blank shape with no detail left.
- Leaning towers: verticals tilted by a careless crop or a wide lens left uncorrected.
- Muddy mixed light: warm lamps and cool daylight blended into one dull tone.
- Clashing frames: a series that jumps between clean, moody and vivid styles.
Frequently Asked Questions
What preset style suits city photos best?
A clean, modern style that keeps lines sharp and colours true suits most city scenes best. It holds the energy of the streets without turning the frame garish or noisy.
How do I keep neon from looking garish?
Choose a preset that keeps neon colours distinct, then ease the vividness back until each sign shows its letters clearly. Checking the brightest sign in the frame is the fastest way to spot excess colour.
Can one preset work for day and night city shots?
Yes, if you retune it between day and night. Keep one clean base throughout, then tame the brightest signs for daytime frames and lift the darker lanes a touch after dark — the base stays constant, only its exposure and tint move with the hour.
Do city presets work for village streets too?
They often do, since both settings share buildings, lanes and mixed light, though village frames usually need warmer tones and softer contrast. Test the preset on a village frame before committing to it.
Should city photos be sharp or moody?
A sharp, clean grade with a gentle mood suits most urban scenes — picture a quiet lane at dusk, edges crisp but nothing forced. Grades that sharpen every surface into noise, or sink the streets into gloom, both strip the city of what makes it itself, so steer clear of those two extremes.
How do I fix leaning buildings in city photos?
Pick a style that keeps verticals true, then use the geometry controls to straighten towers and facades before you finish. Checking the tallest building in the frame is the fastest way to spot a lean.
Final Thoughts
A good city image leaves the viewer sensing the streets’ rhythm — the hurry, the glow, the quiet corners tucked between. Stay with one clean grade for the set, keep neon vivid without letting it bleed, keep towers upright, and resist pushing any slider to extremes. Handled that way, your frames carry the place itself: crisp streets, bright signs, and a city that never quite stands still.