
Best Lightroom Presets for Selfies
A good selfie is not a small landscape photo. It is a close portrait, taken at arm’s length, with your face filling most of the frame. A preset made for mountains or city streets can look lovely on a wide scene and terrible on skin. It can turn a warm smile orange, make eyes look dull, or flatten the soft light on a cheek into a grey patch. The Best Lightroom Presets for Selfies are built the other way around. They start with skin, then shape the light and colour around it.
What Makes a Selfie Preset Different
A landscape preset is allowed to be dramatic. It can push the blues in a sky, deepen the greens in grass, and add strong contrast to rocks and water. Skin does not forgive that kind of push. Human skin lives in a narrow band of warm tones, and a small shift in hue can make a healthy glow look sunburned or washed out. A selfie preset therefore works with a lighter touch on saturation, a steadier white balance, and a softer contrast curve.
The second difference is detail and background. Landscapes love sharpness and texture. Faces love a little softness in the right places. A good selfie preset does not blur your face into plastic, but it does avoid sharpening every pore and tiny blemish. It keeps the eyes and lips clear while letting the rest of the skin breathe. It also pulls the background down a touch, so your face stands forward and your eye goes to the person first.
Matching Presets to Skin Tone
Skin tone is a mix of depth, warmth, and undertone, and it changes with the seasons. A preset that flatters fair skin in winter light may look flat on deep skin in summer sun. The goal is not to lighten or darken anyone. The goal is to keep the skin looking true while the light around it improves.
For fair skin, watch the reds. Fair skin picks up redness quickly, especially in warm indoor light or after a walk in the sun. A preset with a gentle hand on red saturation, a slightly cooler white balance, and soft highlights will calm that flush without making the skin look pale or grey. Avoid presets that add a lot of warmth, because warmth plus fair skin often reads as orange.
For medium skin, warmth is usually your friend, in moderation. Medium tones can carry a golden or honey glow beautifully, and a preset that lifts the warm tones a little will make the skin look healthy and sun-kissed. Keep some contrast in the mid-tones so the face keeps its shape, and do not let the highlights blow out on the forehead and nose.
For deep skin, richness matters more than brightness. Deep skin has beautiful warm and cool undertones that a heavy preset can flatten into one dull brown. Look for presets that protect the shadows, keep the reds and oranges distinct, and add a soft glow to the highlights rather than a flat wash of light. A little extra clarity on the eyes and lips helps, but keep it away from the wider skin.
Best Presets for Indoor Selfies
Indoor light is the hardest selfie light. It is often yellow from lamps, mixed with cool light from a window, and too dim in the corners. The phone tries to fix it and often leaves the skin looking uneven, with a yellow cast on one side of the face and a grey cast on the other. A good indoor preset starts by steadying the white balance, then lifts the shadows just enough to show the eyes clearly, without pushing the exposure so far that the face glows like a lamp.
Best Presets for Outdoor Selfies
Outdoor daylight is generous, but it is also strong. Midday sun creates hard shadows under the eyes, on the nose, and under the chin. A good outdoor preset softens those shadows without flattening the face.
Best Presets for Low Light Selfies
Low light is where most selfie presets fail. The phone raises its sensitivity, noise appears, colours go dull, and the skin loses its warmth. A preset that tries to fix this by adding sharpness or clarity will only make the noise louder. A good low light preset does the opposite. It accepts a little softness, controls the noise, and brings back warmth through gentle colour rather than through brightness alone.
Best Presets for Golden Hour Selfies
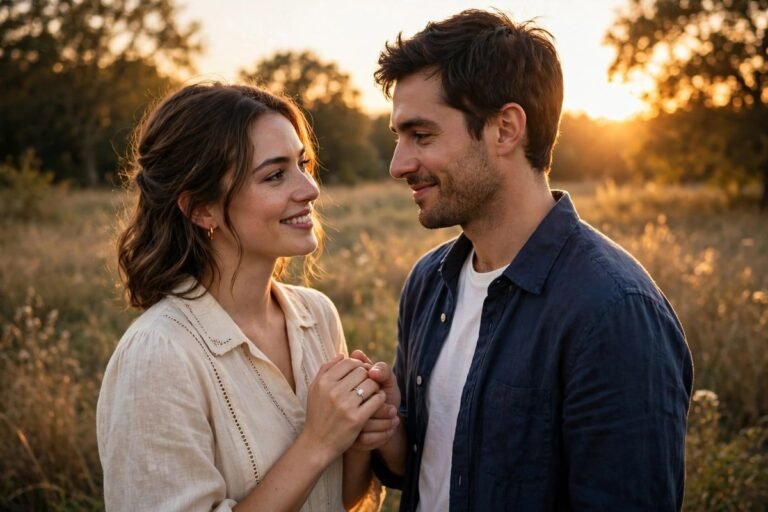
Golden hour is the easiest light to love and the easiest to overdo. The sun is low, warm, and soft, and it already gives skin a beautiful glow. A preset for golden hour should protect that glow, not add more of it. The most common mistake is stacking warm presets on warm light until the skin turns orange and the background turns yellow. A good golden hour preset keeps the warmth, adds a little clarity to the eyes, and adds a little depth to the shadows, so the face keeps its shape. If you want more ideas, try our guide to the best Lightroom presets for golden hour.
9 Named Presets Worth Trying
The presets below are named styles, not brand products. Each one describes a look you can find, build, or recognise in a preset pack. Try them one at a time, on the same selfie, and compare them side by side.
1. Clean Daylight
Clean Daylight is the everyday preset. It brightens the face a touch, steadies the white balance, and keeps colours true. It adds almost no style of its own, which makes it the safest starting point for any selfie.
2. Soft Glow
Soft Glow adds a warm, gentle light to the skin, with soft highlights and a slight lift in the mid-tones. It is made for indoor selfies and cloudy days, when the face needs a little warmth to look awake.
3. Warm Honey
Warm Honey leans into golden tones, with a honeyed warmth in the highlights and a soft amber feel in the background. It suits medium and deep skin beautifully, especially in afternoon light.
4. Cool Rose
Cool Rose is a pink-leaning preset that suits cool undertones and fair skin. It adds a fresh, rosy tint to the cheeks and lips, cools the background slightly, and keeps the whites of the eyes clean.
5. Golden Hour Glow
Golden Hour Glow is built for low sun, with warm highlights, soft shadows, and a gentle film-like tone. It keeps the sunlit warmth on the skin while stopping the background from turning flat yellow.
6. Night Soft
Night Soft is a low light preset that lifts shadows slowly, controls noise, and adds a small amount of warmth back to the skin. It is made for evening selfies, restaurant light, and city lights after dark.
7. Bright Airy
Bright Airy lifts the exposure, softens the contrast, and gives the photo a light, fresh feel. It suits spring and summer selfies, white walls, and bright rooms. Lower it for deep skin, or it can wash the face out.
8. Matte Portrait
Matte Portrait lowers the contrast, softens the blacks, and gives the photo a calm, editorial feel. It is a good choice when the background is busy, because the matte tone quiets the scene and lets the face lead.
9. True Tone
True Tone is the most honest preset in the list. It corrects the white balance, evens the exposure, and leaves the colours almost untouched. Use it when you want the photo to look like you, in real light, with no obvious style.
Mistakes to Avoid With Selfie Presets
Most bad selfie edits come from a few repeatable mistakes. Learn them once, and you will avoid them every time you edit.
- Using a preset at full strength every time. Presets are made to be adjusted. Try sixty or seventy percent first, and watch the skin settle back into something natural.
- Whitening the teeth and eyes too far. A small lift is fine, but bright white teeth and glowing eyes look fake at a glance. Keep the whites soft, and let the natural colour stay.
- Chasing the same look in every light. A warm golden preset that looks lovely at sunset will look strange under office lights. Match the preset to the light, not to your mood.
- Ignoring the background. A preset that makes your face look great but turns the wall behind you green, or the sky behind you grey, has not finished the job. Check the whole frame, not just the face.
- Using a black and white preset to hide a bad colour edit. Black and white can be beautiful, but it should be a choice, not a rescue. If you love monochrome selfies, learn what makes them work in our guide to black and white Lightroom presets.
A Short Phone Editing Routine for Selfies
You do not need a long routine. A short, steady routine, done the same way each time, will give you consistent results and save you from over-editing. Start with the original photo, work in order, and stop when the photo looks like you on a good day.
- Open the original selfie in Lightroom Mobile and check the light. Note whether it is indoor, outdoor, low light, or golden hour, and pick a preset made for that light.
- Apply the preset at a lower strength first, around seventy percent, then look at the skin. If the skin looks true, keep it. If it looks orange, pink, or grey, lower the strength further.
- Fix the white balance next, with a small nudge only. Warm it a touch if the skin looks cold and grey, or cool it a touch if the skin looks yellow.
- Set the exposure so the face is bright enough to see the eyes clearly, without blowing out the forehead or the cheeks. Pull the highlights down a little if the brightest skin loses detail.
- Save a copy and compare it with the original, side by side. If the edit looks like a better version of the same photo, you are done. If it looks like a different person, go back and lower the strength.
New to Lightroom Mobile? Follow our guide on how to install Lightroom presets on mobile first. The routine above then takes less than a minute.
Closing Thoughts
The Best Lightroom Presets for Selfies are not the strongest ones, or the most popular ones, or the ones with the prettiest names. They are the ones that respect your skin, match your light, and leave you looking like yourself. A good selfie preset is quiet work. It steadies the colour, softens the harsh light, and lets your expression do the talking.